Hướng dẫn lắp đặt Bồn cầu 1 khối


Hướng dẫn lắp đặt Bồn cầu 1 khối

29/09/2020

[external_link_head]

[external_link offset=1]
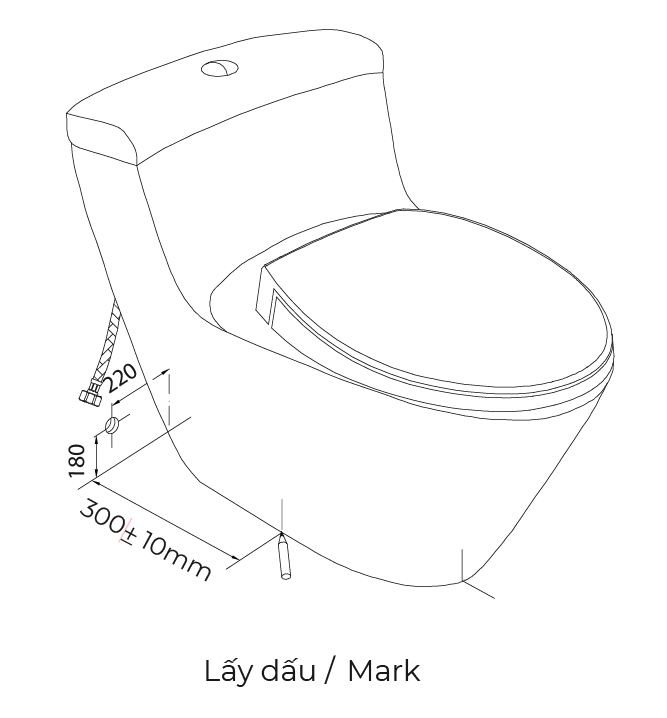
Hướng dẫn lắp đặt Bồn cầu 1 khối

1

Lấy dấu tâm lỗ thoát sàn và tâm lỗ xả bàn cầu. Đặt bàn cầu vào vị trí lắp đặt, lấy dấu chân bàn cầu.

Mark the center line of waste trap pipe and the center of toilet bowl trap outlet. Place the toilet into installation position then mark toilet leg.

Hướng dẫn lắp đặt Bồn cầu 1 khối

2

Tráng xi măng trắng hoặc silicone rộng 20 – 30mm, dày khoảng 10mm theo đường viền chân bàn cầu và xung quanh bên ngoài lỗ thoát.

Paste evenly white cement or silicon gel to heal the foot lines of the toilet bowl  and outlines of waste trap pipe in the area of 20-30mm, thickness 10mm around the foot land pipe lines.

Hướng dẫn lắp đặt Bồn cầu 1 khối

* Chú ý: Tuyệt đối không tráng kín xi măng vào phần trong đáy bệt.

* Keep warning: do not fullfill the cement over the underneath of toilet bowl.

[external_link offset=2]

3 Lắp đặt bàn cầu xuống sàn.

Install the toilet onto the floor.
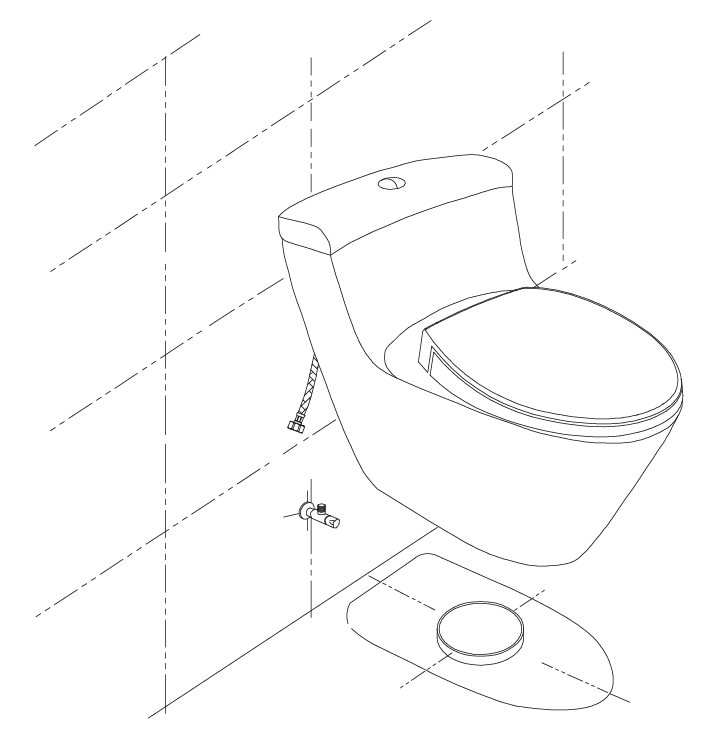
Hướng dẫn lắp đặt Bồn cầu 1 khối
4 Lắp dây cấp với van cấp nước

Connect the flexible hose with the water valve.

Hướng dẫn lắp đặt Bồn cầu 1 khối

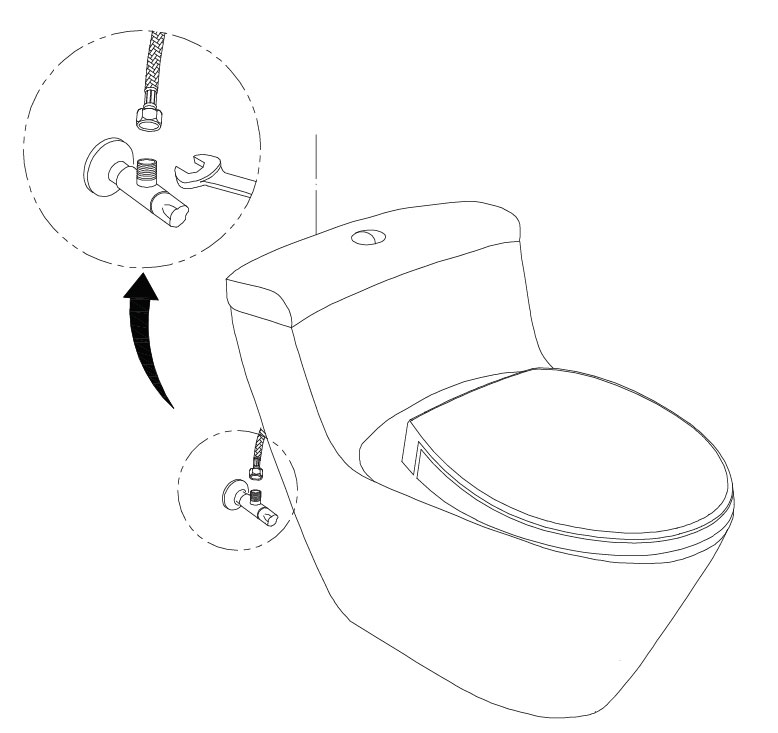
* Chú ý: 

– Không đẩy sát bàn cầu vào tường, để lại khoảng trống đủ để lắp dây cấp vào van cấp.

– Xả nước sạch cặn bẩn trước khi lắp dây cấp nước vào van cấp.

– Khi lắp dây cấp không làm xoay cột cấp nước trong két nước.

* Note: 

– Don’t push the toilet tight to the wall, please leave a space so that enough to insatall flexible hose and stop valve.

– Rinse the water from the debris before attach the water supply cord to the inlet valve.

– When installing the supply line, do not rotate the water supply column installed in the tank

5 5/ Cố định bàn cầu và làm kín chân bàn cầu bằng xi măng trắng hoặc silicone.

Fixed the toilet and close leg by white cement or silicone.

Hướng dẫn lắp đặt Bồn cầu 1 khối

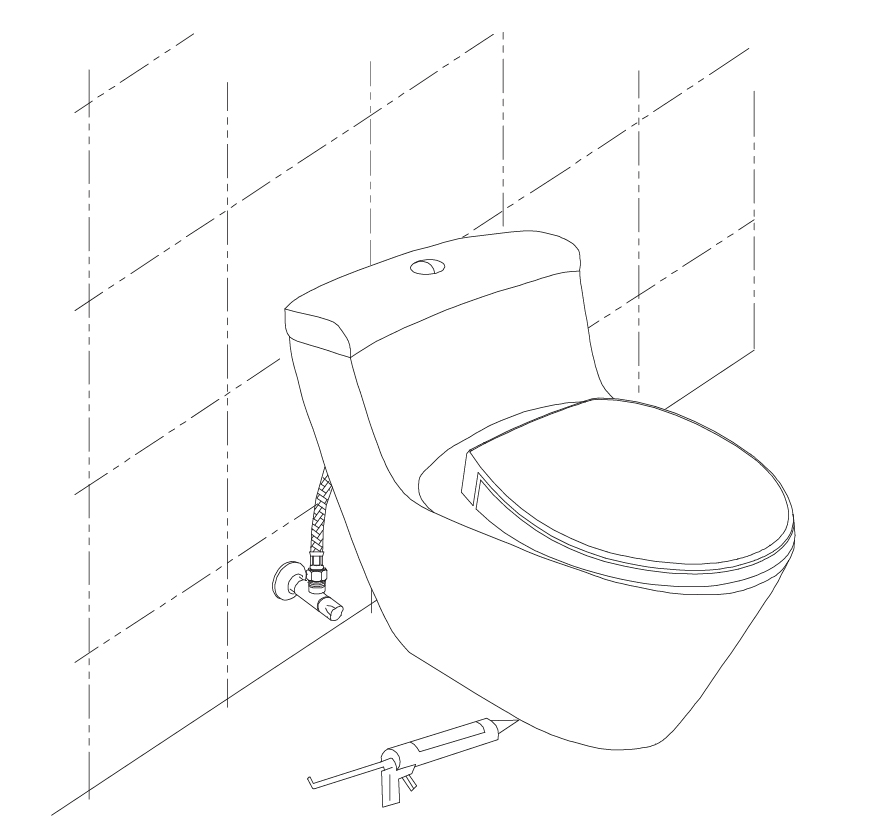
* Chú ý: Hình ảnh chỉ mang tính minh họa.

* Note: The drawing is only illustrative.

[external_footer]

Alternate Text Gọi ngay